To add a white background to a photo, open Make Background White, upload your image, and click Remove background. This page applies white automatically after processing. Check the result, then click Download PNG to save a solid white background with your subject.
Start with a photo that still has its original background. This workflow replaces that background; it does not add a white border around the whole picture.
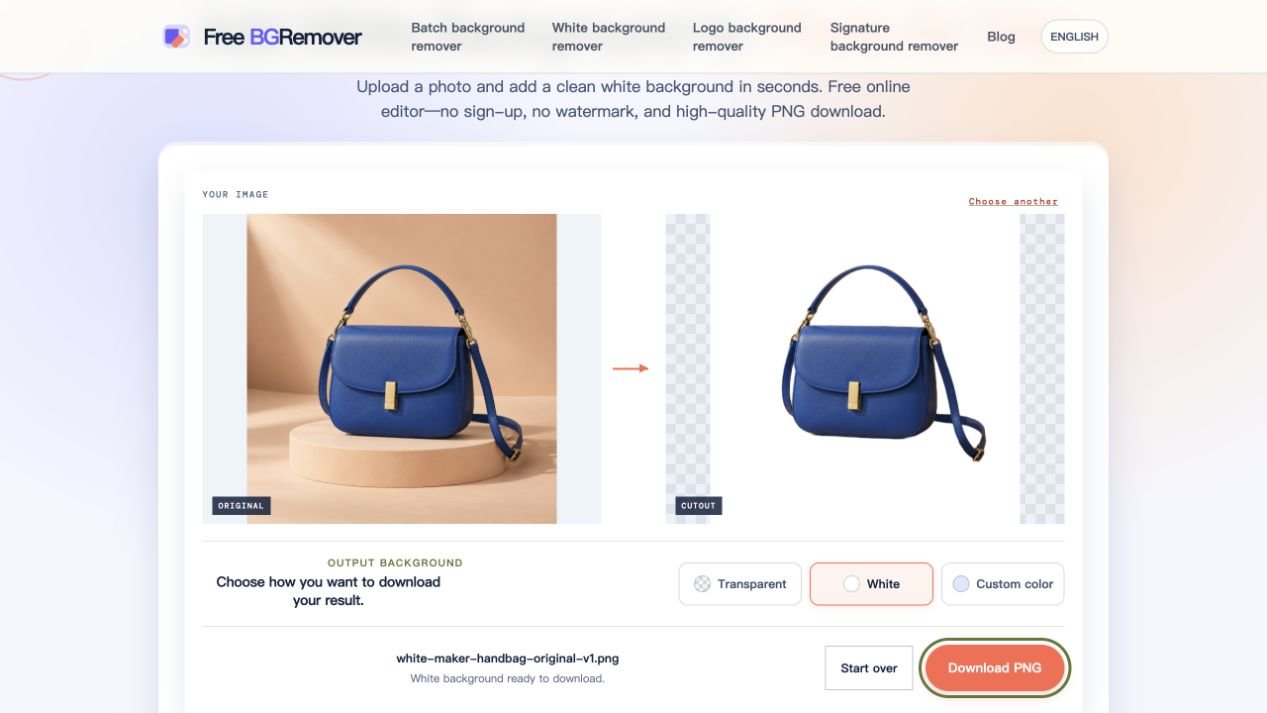
The screenshots in this guide show an actual tool session. The original handbag image is an AI-generated sample; the white-background result is the file produced by the tool, without manual retouching.
Add a white background online: upload to download
You can use Free BGRemover without an account, payment, or watermark. It accepts JPG/JPEG, PNG, and WebP up to 15 MB. Background removal requires a browser and device with working WebGPU support. The first run also needs an internet connection to download the processing model.
1. Upload your original photo
Open the white background tool and choose Upload an image. Select the original file rather than a screenshot from a messaging app. Once it loads, the left panel shows your photo and the right panel is empty.
In our example, the upload is a 1254 × 1254 image of a blue handbag on a peach-colored stand. The handle, long strap, and gap between the strap and bag give us specific details to check afterward.
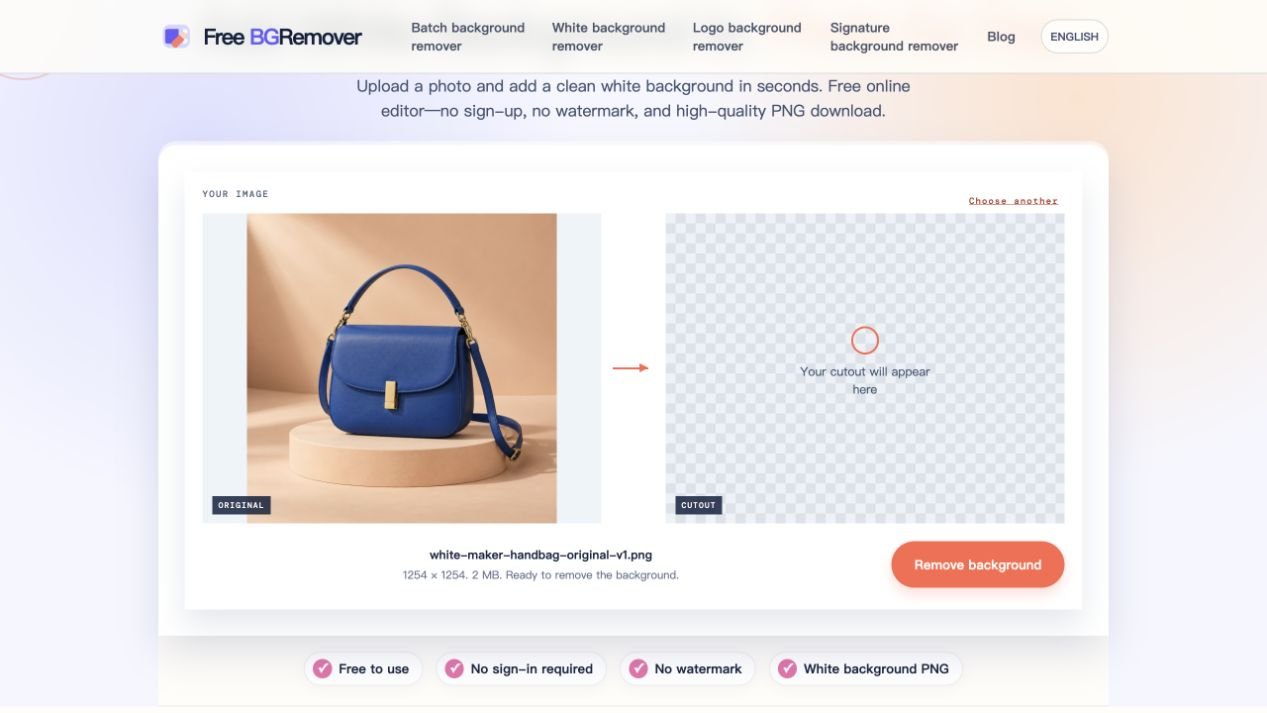
2. Remove the background and confirm White
Click Remove background and keep the tab open while it processes. The first run can take longer because the model needs to load; completion time depends on your connection and device.
When processing finishes, White is already selected under Output background on this tool page. If you switch to Transparent or Custom color while checking the edges, select White again before saving. These controls appear only after background removal succeeds.
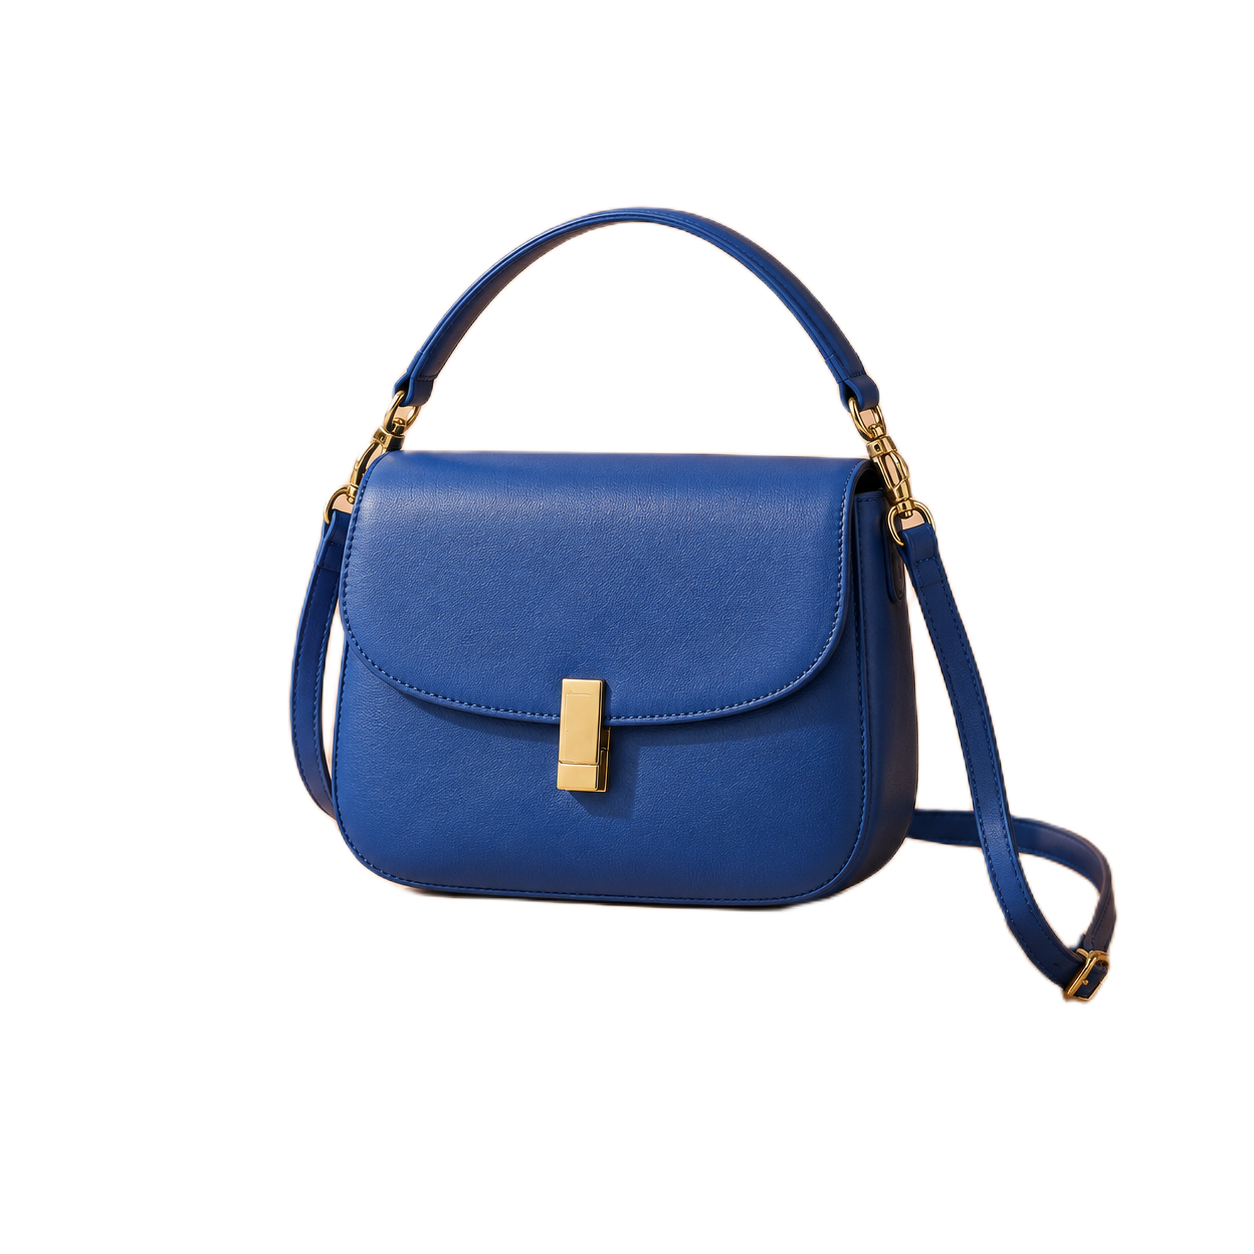
Check three things against the original: the full outline, small parts such as straps or hair, and empty spaces inside handles. In the sample, the peach stand disappears and the opening under the handle becomes white. That does not establish how the tool will handle curly hair, glass, or every product photo; inspect those subjects separately.
3. Download the PNG and open the saved file
Click Download PNG, then open the file from your browser’s downloads list. Use that file rather than a screenshot of the preview. The checkerboard beside a square image in the editor can be part of the preview area outside the image; it does not by itself mean the saved background is transparent.
For this sample, we checked the downloaded file: it is 1254 × 1254 pixels, every pixel is fully opaque, and all four corners are RGB 255, 255, 255. The image below is that download. You can open the full-size PNG to inspect the strap and handle yourself.
Check dimensions before using a large photo. The normal browser processing path reduces images whose longest side exceeds 2200 pixels. Larger uploads may therefore produce smaller downloads; original-resolution output is not guaranteed. Check the saved file’s dimensions against your listing, design, or print requirements.
Check gray patches, halos, and missing details
Changing the background color cannot repair a bad cutout. White fills the space around the extracted subject; any old background mistakenly kept with that subject can remain visible.
| What you see | What to do next |
|---|---|
| The whole background has the wrong color | Select White, wait for the preview to update, and download again. |
| A gray or colored patch remains beside the subject | Compare it with the original. If it is retained background, selecting White again will not remove it. Try a source photo with a simpler backdrop. |
| A thin colored rim surrounds the subject | Inspect the edge at 100% zoom. Try a photo with neutral lighting and clearer separation from the backdrop; the tool has no manual edge-cleanup control. |
| Hair, a strap, or pale fabric is missing | Try a sharper source where that detail stands out from the background. Keep the original: the downloaded result cannot restore removed pixels. |
| The product appears to float | The original stand or contact shadow was removed. The tool does not add a replacement shadow; check whether the result suits your intended layout. |
| The download looks soft | Check its pixel dimensions and the size at which you are displaying it. Enlarging a small result will not recover detail. |
To try a different source, choose Choose another, then Upload an image. Keep your original files until you have a usable result. Free BGRemover has no manual restore brush, and reprocessing an unchanged image is not a reliable repair. If an important detail is still missing, the current result is not ready to use.
Using an iPhone or Android phone
On a supported phone, open the tool in your browser, choose Upload an image, and select a JPG, PNG, or WebP from Photos or Files. HEIC is not an accepted upload format here; export or convert a copy to JPG first if needed.
The upload control may work even when background processing cannot run. The browser, operating system, and device must support WebGPU. If processing fails, check your connection for the initial model download, try an updated browser, or switch to a compatible desktop. This guide’s sample was tested in a desktop browser; it is not a compatibility test for every iPhone or Android model.
After tapping Download PNG, look in the browser’s downloads list or the Files app. Open the saved image and use its share or save option if you want a copy in your photo library.
Questions before you use the image
Can I add white directly to an existing transparent PNG?
Free BGRemover currently shows its background color controls only after a removal run. It does not offer a separate white-fill operation for an existing cutout. Keep that transparent file; if you also have the original photo, use the upload-to-download workflow above.
Is white the same as transparent?
No. A transparent file lets whatever is behind it show through. A white-background file contains visible white pixels. If you need both, download the White version, switch to Transparent, and download a second copy.
Can I download a JPG instead?
Free BGRemover exports PNG and does not currently offer JPG download. Check whether your destination accepts PNG before processing your photo.
Will it meet product listing or ID photo requirements?
A white background alone does not establish acceptance. Check the destination’s required dimensions, framing, file format, and editing rules before using the image. The workflow above changes the backdrop; it does not validate a listing or official photo submission.