Compare background remover tools using the same source images and the files you actually download. Check whether each result preserves the details you need, meets your export requirements, and takes an acceptable amount of time and money to finish.
How to compare background remover tools: the quick version
- Pick a few images you actually work with. Include a typical file and one with a difficult edge or small detail.
- Process the same originals in each tool. Use equivalent settings, without added backgrounds or effects.
- Download the results. Look for missing details and leftover background, then check the file dimensions and transparency.
- Set aside options that cannot deliver what you need. A fast preview is little help if the usable download is too small or a letter is missing.
- Compare the effort and price of the remaining options. Include any cleanup and the steps needed to save your files.
If you only need an occasional cutout, focus on image quality and download limits. For regular product-photo work, also read the batch and cost sections. Before using personal or customer images, check how the service handles them.
Decide what a usable result looks like
Write down where the image will be used, the required file format and dimensions, and roughly how many images you handle. Identify any detail that must survive: a product label, fine hair, a signature ending, or the dot above a letter.
For a website logo, intact lettering and a transparent PNG may be enough. For a product catalog, you may also need large files, batch downloads, and filenames you can match to each item.
Separate requirements from conveniences. Required output size may rule a tool out immediately. An extra background effect may have no value for the work you do.
Build a small test set from your own work
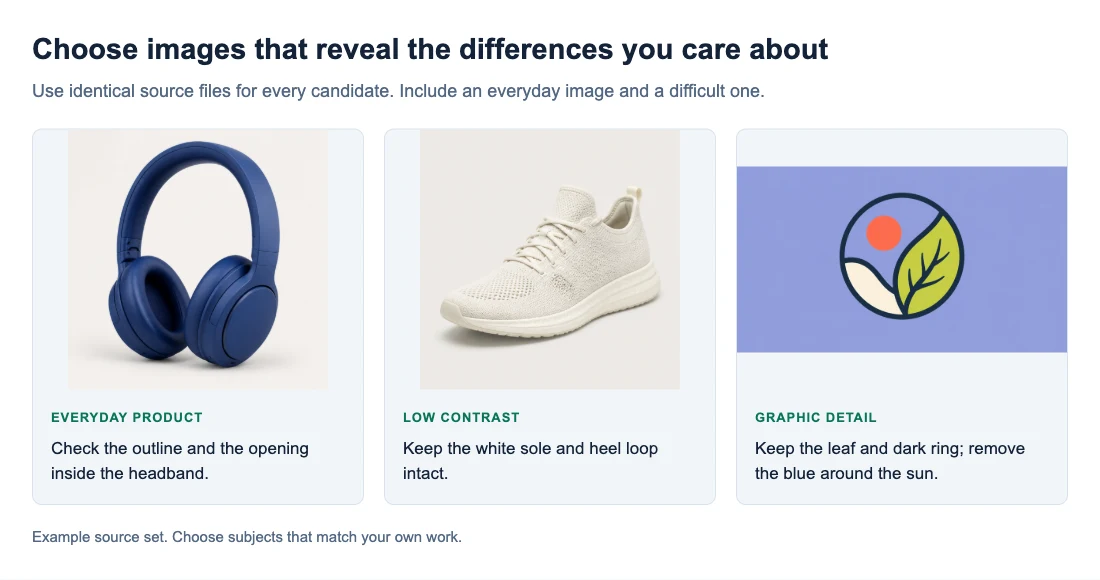
Choose three to five representative files to start. Include an everyday image, one with important fine detail, and one that has previously been difficult to cut out. Add glass, reflective packaging, or similar-colored backgrounds if those are part of your normal work.
The headphones in the cover are useful for checking the opening under the headband; the pale shoe tests whether the white sole stays intact. If you mainly edit portraits, use your own hair and clothing examples instead.
A screenshot or a differently cropped copy changes the test. Keep the originals together and name each result with its source filename and the tool used.
Compare downloaded files under the same conditions
Use the same source and output settings
Choose equivalent output settings where available: transparent background, the required dimensions, and no added scene or effect. Record the plan or mode used. If one option only provides a smaller free download, note that limit instead of treating it as an equivalent export.
Compare automatic results first. If you then use a restore brush or another correction feature, save that version separately and record the extra time. This shows both what the tool handles automatically and what you must do yourself.
Check subject detail and leftover background
Compare the cutout with the original at the same locations. Look for missing letters, hair, straps, or pale product edges. Check openings inside handles and graphics for patches of retained background.
Also look for changes to the subject’s color or shape. A white star inside a badge may be artwork that needs to stay. Removing all white areas would not be a successful result for that logo.
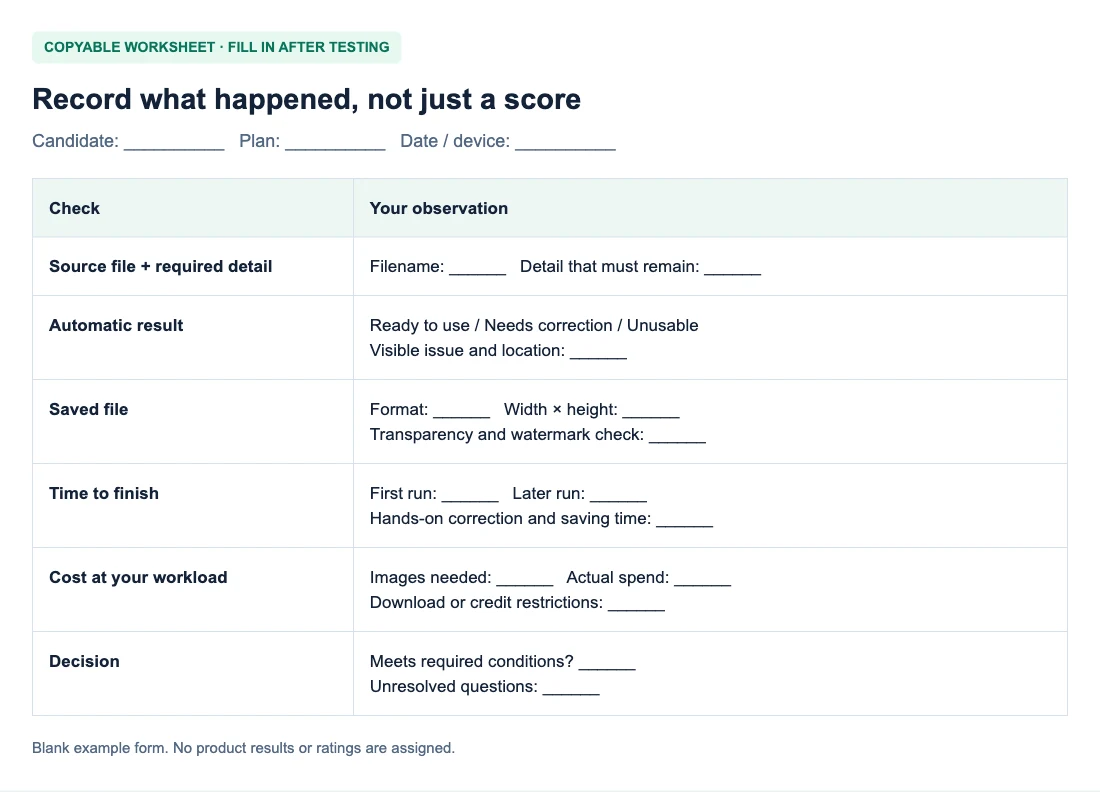
Record a concrete observation such as “the final letter lost its dot” or “a pale rim remains along the handle.” Those notes are easier to act on than an unexplained quality score.
View the cutout on light and dark backgrounds
Place each saved file on the same light and dark surfaces. Pale fringes are easier to see on dark backgrounds, while dark remnants can stand out on light ones. A checkerboard preview alone can hide these differences.
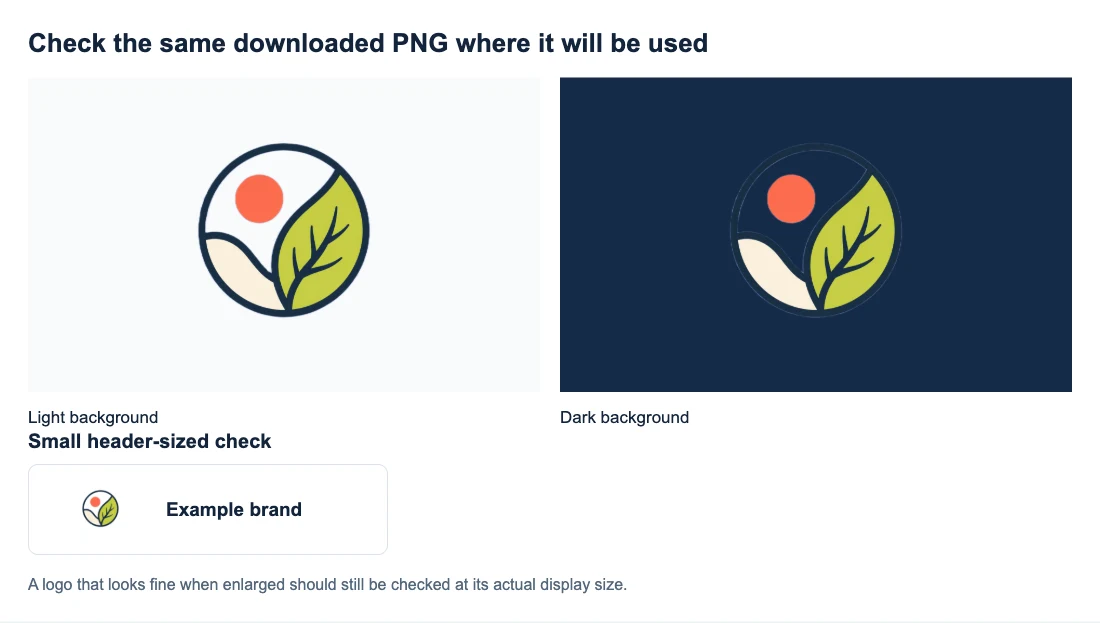
The dark ring has not disappeared from the file: it blends into navy because the colors are similar. Before rejecting a cutout for missing detail, try a contrasting background and compare it with the original.
Inspect at 100% and at the final display size
Inspect the downloaded files at 100% to find changes, then compare them at the size used in your design. A fringe visible under extreme magnification may be irrelevant to a small thumbnail, while a missing letter can remain a problem at any useful size.
If exports have different dimensions, record that difference and check each against your size requirement. Enlarging a small download for a side-by-side display does not give it the detail of a larger original.
Check export limits before committing to a workflow
Complete a download for each candidate and check:
- Transparency: place the file over a colored area. A PNG filename alone does not prove the background is transparent.
- Dimensions: read the saved file’s pixel width and height, not just the preview size.
- Watermarks and access: note whether the usable download requires an account, credits, or a paid plan.
- Input limits: confirm your normal formats and file sizes are accepted.
If the saved file still looks like a white rectangle, the transparent PNG guide explains how to tell a viewer’s background from white pixels in the image.
Measure the time needed to finish the job
Time one complete job, from selecting a file to saving a usable result. Include review and cleanup, not just the processing spinner. Two minutes spent fixing an edge affects your day differently from two minutes of waiting while you do something else.
Use the same device and similar network conditions. Keep the first run separate from later runs because setup or model loading may change the wait. Repeat a small test if one run looks unusually slow rather than drawing a conclusion from a single timing.
For batch work, check multi-file selection, error handling, combined download, and whether filenames remain easy to match. “Batch supported” does not tell you whether a failed file forces extra work or whether each result must be downloaded separately. The batch background removal guide shows one complete queue-to-ZIP workflow.
Compare cost at your actual image volume
Work out the amount you would actually pay to obtain the required downloads. Check what a credit buys, whether retries consume credits, and whether unused allowances expire. Keep a dated note of the plan and restrictions you checked.
For a hypothetical example, a $10 monthly plan used for 20 images costs $0.50 per image that month, even if it includes 100 downloads. Using all 100 would make it $0.10 per image. These are example numbers, not a quoted tool price.
A cheaper download may not save you much if every image needs several minutes of cleanup. Note that time beside the price; you do not need to turn it into an hourly rate to see the tradeoff.
For free options, make sure the free preview and the downloaded file meet the same requirements before you include either in your comparison.
Check image handling and device compatibility
Confirm whether processing happens in the browser or on a server, and read the current information about retention, deletion, and training use. If a point is not explained, record it as unconfirmed. “Local processing” alone does not answer every question about the site’s other data handling.
Try the tool on the phone or computer you intend to use. A browser-based tool may still need particular browser features or enough memory. While checking a service’s handling terms, use a non-sensitive sample you have permission to process, rather than a customer’s private image.
Use a comparison sheet to make the decision
Copy the table into your notes and replace Tool A and Tool B with the names you are comparing. Fill the empty cells with your observations. For a sample result, a note such as “needs correction: pale rim on handle” is more useful than a star rating. Skip batch and paid-plan rows if they do not apply.
| Check | Tool A | Tool B |
|---|---|---|
| Test date and plan | — | — |
| Browser and device | — | — |
| Typical image: usable, or what needs fixing? | — | — |
| Difficult image: which details survived? | — | — |
| Download: format and pixel dimensions | — | — |
| Transparent, watermark-free file? | — | — |
| Cleanup needed and minutes spent | — | — |
| Total time to save a usable result | — | — |
| Batch: failed files, ZIP, filenames | — | — |
| Price for my expected usage | — | — |
| Image handling: confirmed or unclear? | — | — |
| Meets my requirements? | — | — |
Make the choice: what is worth a tradeoff?
Start with the requirements you cannot compromise on. A download below your required dimensions, a damaged product label, or unclear handling terms for confidential material can rule an option out. Small differences in convenience come after those checks.
Consider this hypothetical logo comparison: Tool A finishes sooner but removes the dot above a letter. Tool B takes longer and preserves the lettering. Both provide the required transparent PNG dimensions. For that logo, choose B: the saved processing time does not make damaged lettering usable. If A offers a correction control, you can try it, but compare its corrected result and total time against B before deciding.
A faint fringe is a different tradeoff. If it is invisible at the actual header size on your intended background, you may not need to fix it. If the logo will also appear larger or on dark slides, inspect those placements before accepting the result.
When both tools give you usable images, let the everyday work decide. For one picture, the simpler download may matter most. For a weekly catalog update, fewer corrections and a reliable batch download may be worth paying for.
If neither result preserves an essential detail, try a better source image or a tool with suitable correction controls instead of choosing the less damaged file. To include Free BGRemover in your comparison, the background removal tutorial walks through processing and inspecting your first result.
Frequently asked questions
Is a paid background remover always more accurate?
Price alone does not establish accuracy. A plan may charge for export size, volume, or editing features. Test the same source files and record whether the paid features improve the result you need.
Does full-resolution output mean better cutout quality?
It describes output dimensions, not how correctly the background was separated. A large PNG can still lose small lettering or retain a fringe. Check both the dimensions and the subject detail.
How many images should I test before choosing a tool?
Three to five representative images are a useful starting point, not a universal benchmark. If your work includes several distinct subjects or costly failures, expand the test to cover those cases before committing to the workflow.