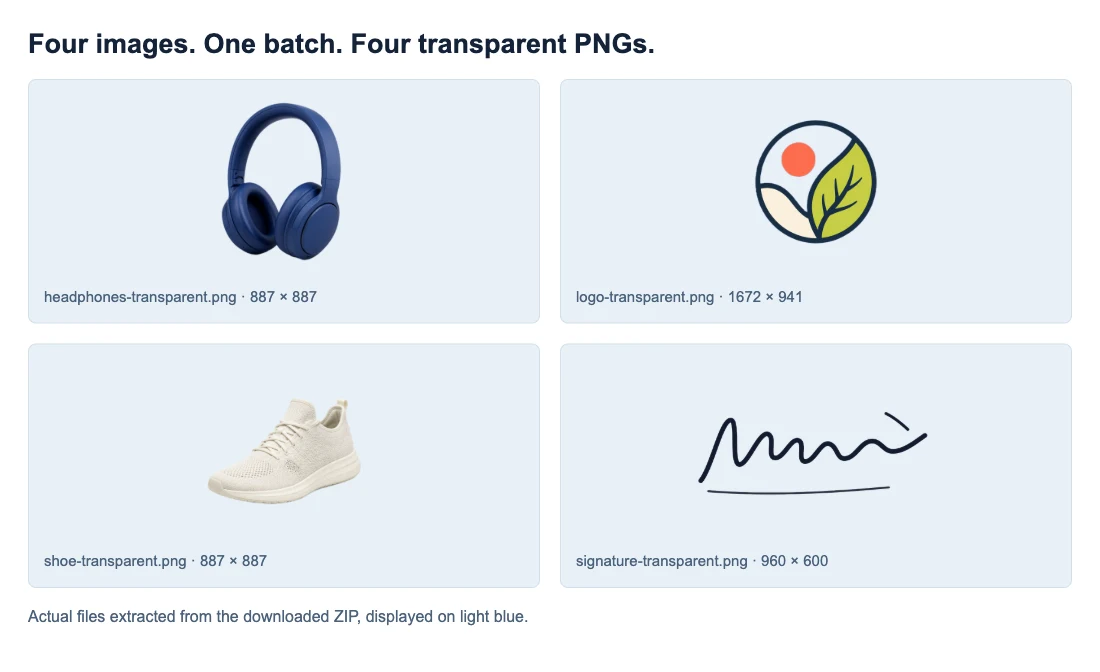
To remove backgrounds from multiple images at once, open Batch Background Remover, select up to 20 images, and click Remove backgrounds. Review the completed cutouts, then click Download ZIP to save them together as transparent PNGs. The tool accepts PNG, JPG/JPEG, and WebP files up to 15 MB each.
We processed four separate sample images—headphones, a shoe, a logo, and an illustrated signature—and downloaded the results in one ZIP. The cover shows those PNGs on light blue.
How to remove backgrounds from multiple images at once
1. Select your images and check the queue
Click Upload images and select several files in the file picker, or drag a selection of image files into the upload area. You can mix supported formats in one batch. Choose the files themselves; folder upload is not part of this workflow.
Before starting, check the thumbnails, filenames, and queue counter. If you selected more files than appear, look for an unsupported format, a file over 15 MB, or the 20-image limit. Add skipped files to a later batch after checking their format and size.
Use Add images to include more files while space remains. Remove an unwanted file with the × on its card.
2. Click Remove backgrounds
Click Remove backgrounds once to start the queue. Files are processed one after another, so you may see one processing card while the others still say Ready to process. You do not need to start each image separately.
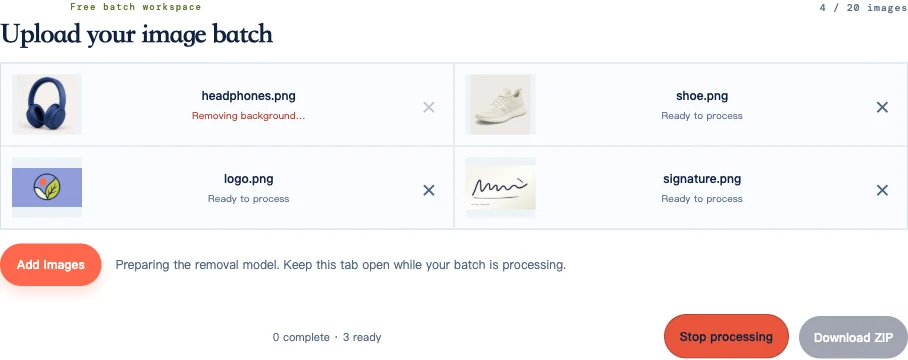
Keep the tab open. The first result can take longer while the browser prepares the model. Total time depends on the device and number of images in the queue.
3. Review completed images and handle errors
A completed card shows Transparent PNG ready. Check the thumbnail for an obviously missing subject or large background remnants. If a file reports a processing error, its Retry image button lets you retry that file while retaining completed results.
For a completed result that looks wrong, download the PNG and compare it with its original. The troubleshooting table below explains what to do when processing succeeds but the cutout is damaged.
4. Download and extract the ZIP
When processing finishes, click Download ZIP. Open the downloaded archive and extract its contents into a folder. Each completed image becomes a separate transparent PNG; the ZIP is the container holding them.
Compare the extracted file count with the completed count. Our run showed 4 complete · 0 ready, and the ZIP held four files. Failed or unprocessed files are not included. If you stop early, you can download the finished results without waiting for every input to succeed.
Check the whole set without inspecting every pixel
First, browse every thumbnail for missing images, wrong subjects, or obvious damage. Then open the files with details that small previews can hide: hair, thin lettering, handles, pale edges, reflective packaging, and transparent materials.
For the headphones, we checked whether the opening inside the headband revealed the new background. The ear cushions should remain solid. For the shoe, the white sole and heel loop should stay visible even though the surrounding pale backdrop is removed.
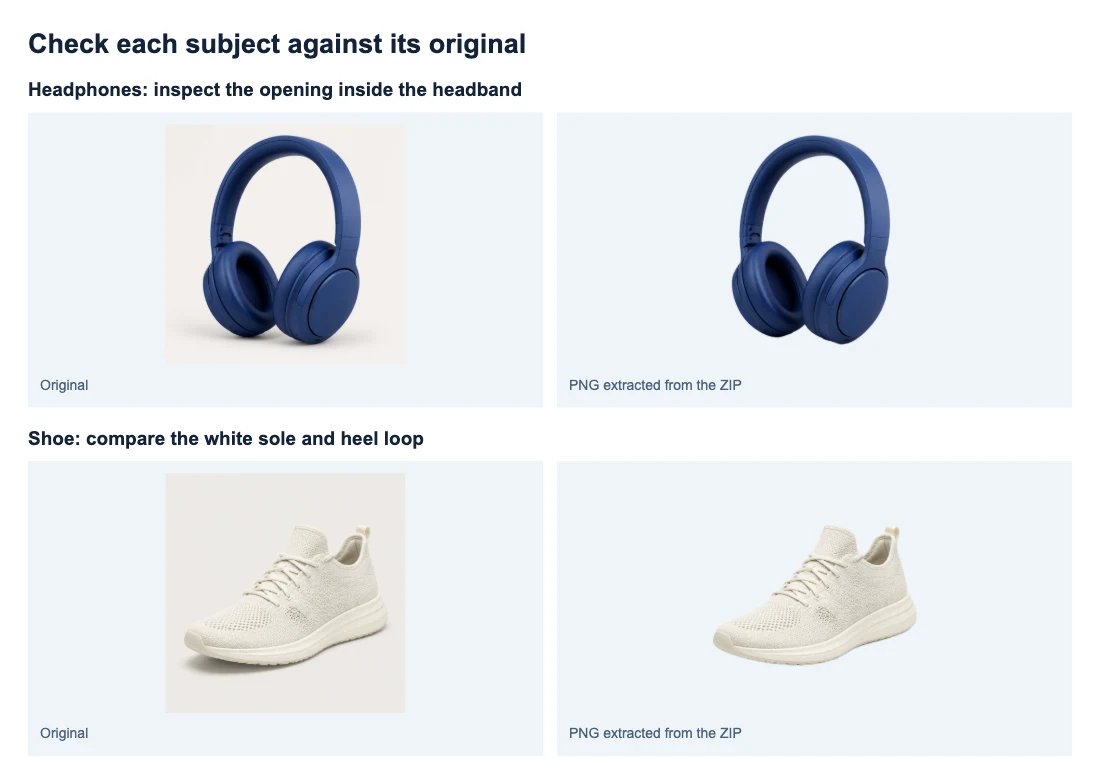
Place questionable edges on a contrasting background and view them at the size you plan to use. Look for a softened outline or missing fine detail on each image that needs closer inspection.
For a larger job, start with a few representative files, including a difficult one. Grouping similar products can make review easier, but mixed subjects are allowed—as in this four-file run. If you need help judging one difficult cutout, see the image background removal guide.
Match the downloaded files to your originals
The output keeps the source’s base name and adds -transparent.png. For example, headphones.png becomes headphones-transparent.png, and product-01.jpg becomes product-01-transparent.png.
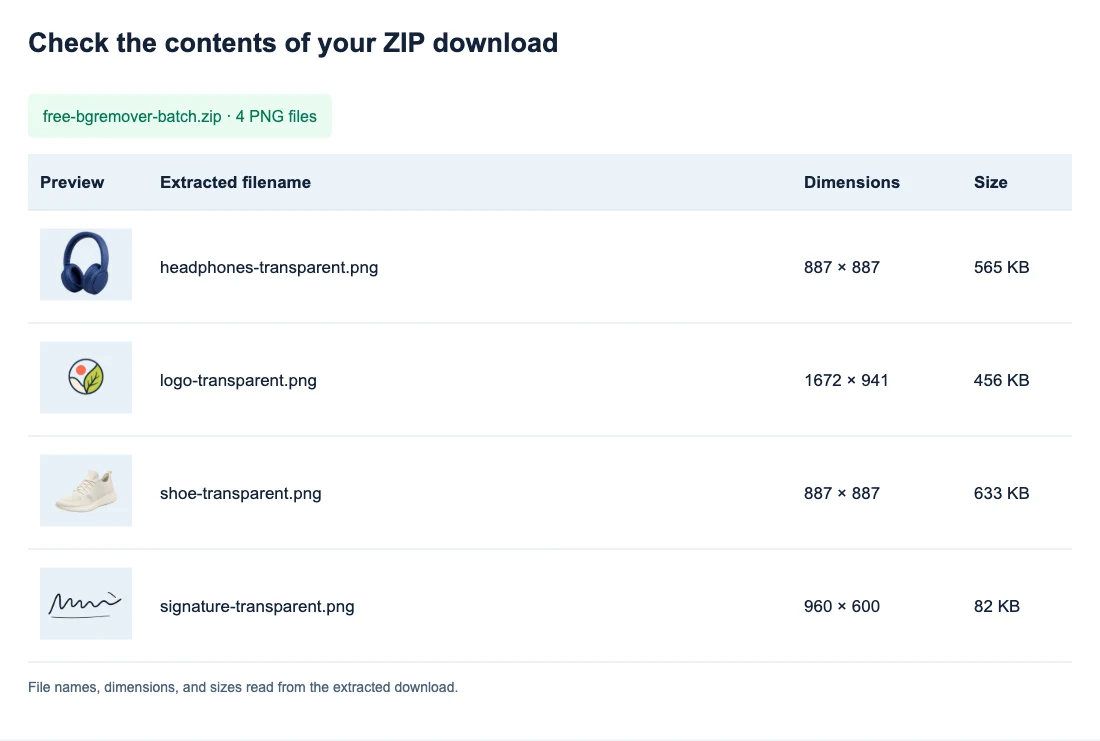
Give different images different base names before uploading. product-01.jpg and product-01.png would both produce product-01-transparent.png, making extraction and matching confusing. Names such as product-01-front and product-01-side keep the views distinct.
Extract each batch into its own folder. For catalog work, compare the filenames with your source list before moving files into listings or design folders. Keep the original sources so you can revisit a missed edge without searching for the photo again.
A second ZIP includes all completed images still in the queue. If you stop and download two results, then finish the remaining two, the next ZIP contains all four. Extract the later ZIP into a separate folder and check its contents before replacing your earlier copies.
What to do when a batch is incomplete
| What happened | What to check or do |
|---|---|
| Some selected files never appeared | Compare the filenames in the queue with your selection. Check missing files against the format, size, and 20-image limits before adding them again. |
| The first image is taking a long time | Look for a preparing or processing message. Allow the initial model preparation to finish; repeated refreshes restart the page rather than advancing the queue. |
| One image cannot be read or processed | Check that its original opens normally on your device. If it does, use Retry image after the current run finishes. If the original is unreadable, replace it with a working copy. |
| A file completed but the subject is partly missing | Compare that area with the original. Retry image is available only for processing errors, and the batch tool has no restore brush. Reprocessing the same source may produce the same cutout. |
| The ZIP has fewer PNGs than you selected | Compare it with the completed count and identify errored, skipped, or unprocessed files by name. |
| The queue disappeared after a refresh | Re-add the source files you still need. This workspace does not restore a queue after reload, so save completed work before leaving the page. |
| The page reports a WebGPU error | Use a browser and device with WebGPU support before trying again. Repeated retries in the same unsupported browser will not resolve it. |
| A compatible browser struggles with the workload | Stop processing, save the completed results, and try the remaining images in a smaller batch. |
Know what batch removal changes—and what it keeps
The batch tool creates transparent PNGs at each source image’s pixel dimensions. In this run, the headphones and shoe remained 887 × 887, the logo 1672 × 941, and the signature 960 × 600.
If your sources have different framing, the outputs will too. Batch removal leaves the original canvas and subject position in place; it does not crop margins or resize products to match. Plan any common sizing or alignment in the layout where you will use the PNGs.
This batch workspace also has no white-background or custom-color output selector. Use the transparent files in your intended layout, and check its sizing and background requirements separately. If a saved file looks white in a viewer, the transparent PNG guide explains how to test it.
Frequently asked questions
Can I remove backgrounds from more than 20 images?
Yes. First download the current results and check the extracted files. Then remove the saved items with the × on their cards and use Add images, or reopen the tool page to start an empty queue. Completed cards count toward the 20-image limit until removed. Save any results you need before removing them.
Can I mix JPG, PNG, and WebP in one batch?
Yes. Each file must meet the 15 MB limit, and the combined selection must fit the available queue space. All completed outputs are PNGs, regardless of their input format.
Can I stop processing and keep the finished images?
Yes. Use Stop processing, then Download ZIP to save completed files. Keep the page open and click Remove backgrounds to continue the remaining queue. A later ZIP includes the earlier results if their cards are still present.
Will all exported images have the same dimensions?
Only if the originals do. Each PNG retains its own source width and height; batch removal does not apply a common canvas size or aspect ratio.