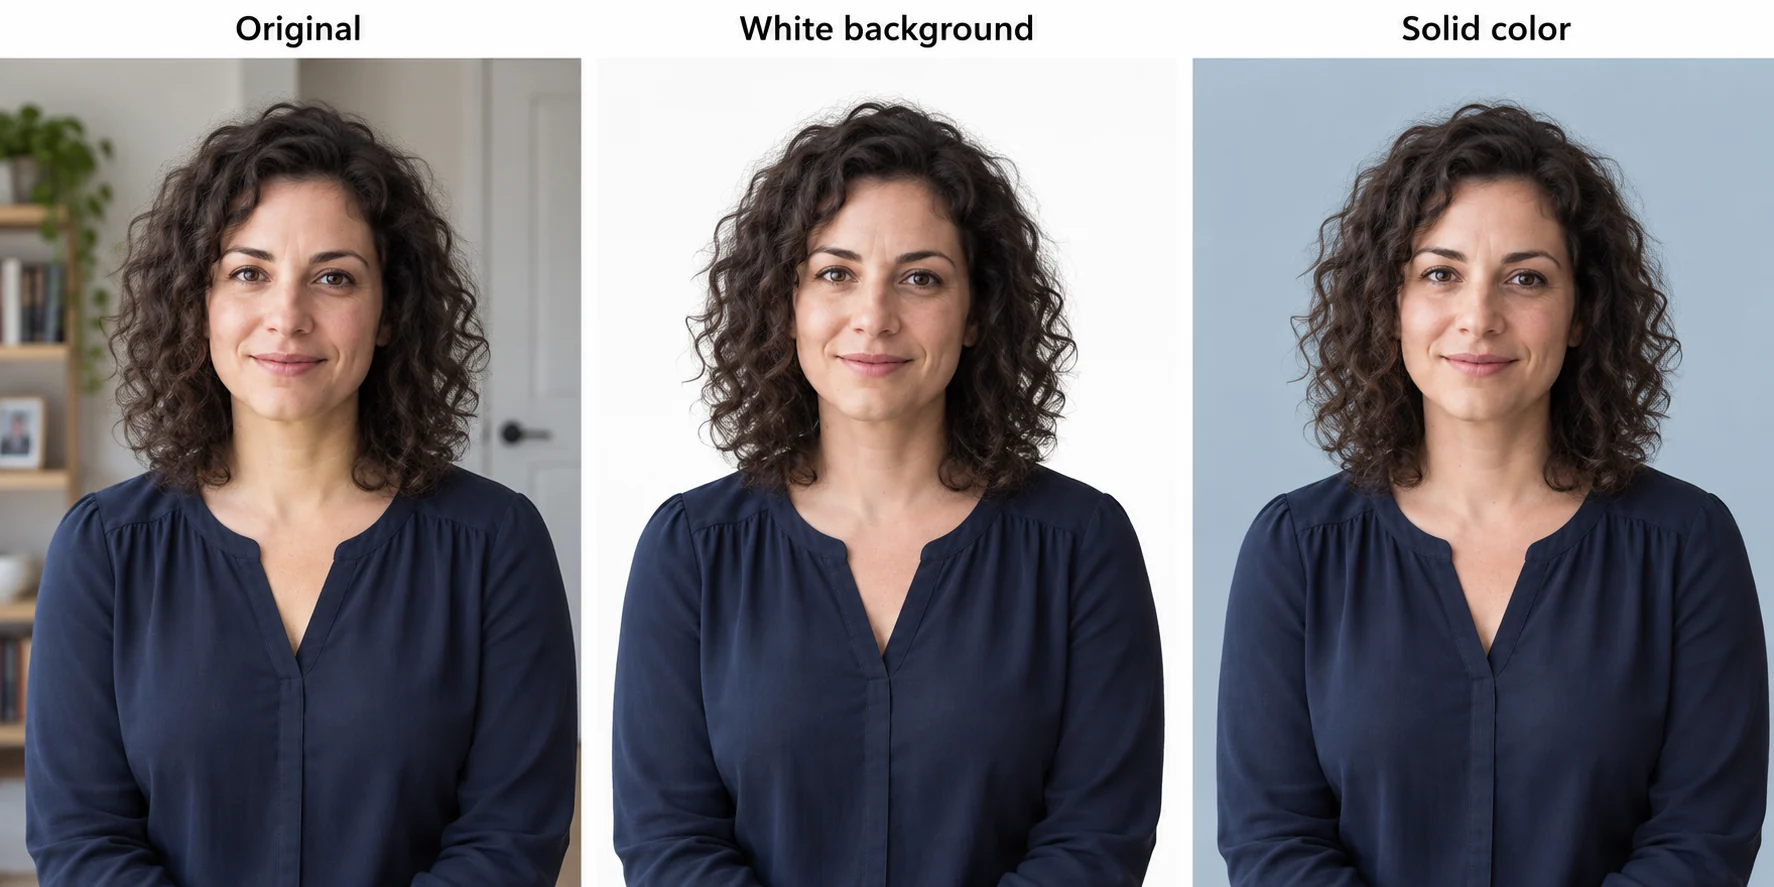
To remove a background from an image online, open a background remover, upload your image, run the removal, and download the result as a transparent PNG. Check the outline before saving: an automatic tool can remove a small detail you wanted to keep.
Follow the steps below in Free BGRemover with your own photo, or save the example image to try the same checks. You will learn how to inspect the cutout, choose a background, and save a transparent file.
Remove an image background online, step by step
1. Open the tool and choose your image
Open the Image Background Remover, click Upload an image, and select a JPG, PNG, or WebP file up to 15 MB. On a phone, tap the same button and choose a file from your photo library or file picker.
Use an original image if you have it. A screenshot may be smaller and can include interface elements you do not want in the cutout. Keep a copy of the original for any corrections later.
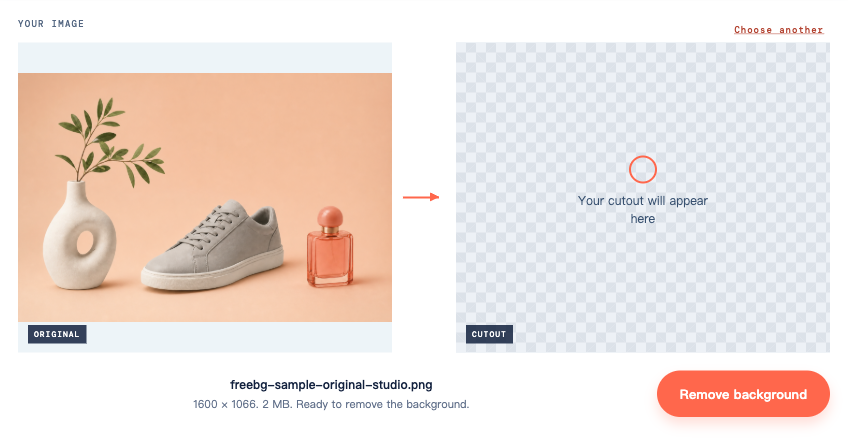
Our example is a 1600 × 1066 product image with a vase, shoe, and perfume bottle on a peach background. The hole through the vase and the gaps between leaves give us specific places to inspect after removal.
2. Click Remove background
Uploading the file does not start removal. Click Remove background below the previews.
The first run may take longer while the tool prepares its model. Keep the tab open while the progress message is visible. If an error appears, use Try again after checking your connection; see the troubleshooting section below if it fails repeatedly.
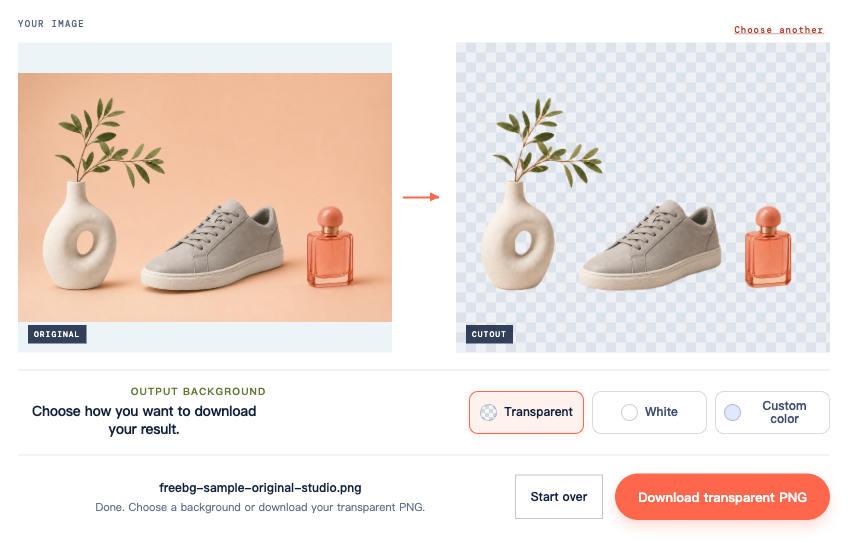
The completed view shows the original beside the cutout and adds the Output background options. This is the point to inspect the image, before downloading.
3. Check the outline and the gaps inside the subject
Compare the two previews. In this example, check three areas:
- Inside the vase: the hole should show the new background. A leftover peach patch means background remains inside the subject.
- Around the leaves: check that thin stems still connect to the branch and that background is removed between leaves.
- Around the perfume bottle: glass can retain the original scene’s color. Removing the area outside a bottle does not necessarily reconstruct what should be visible through it.
For a portrait, do the same check around hair, earrings, glasses, and shoulders. Inspect at the size you intend to use the picture, then enlarge it to find small defects.
Choose White to view the cutout against a light surface. Then choose Custom color, open the color swatch, and select a dark color. Pale fringes are easier to spot on dark backgrounds; dark remnants stand out on white.
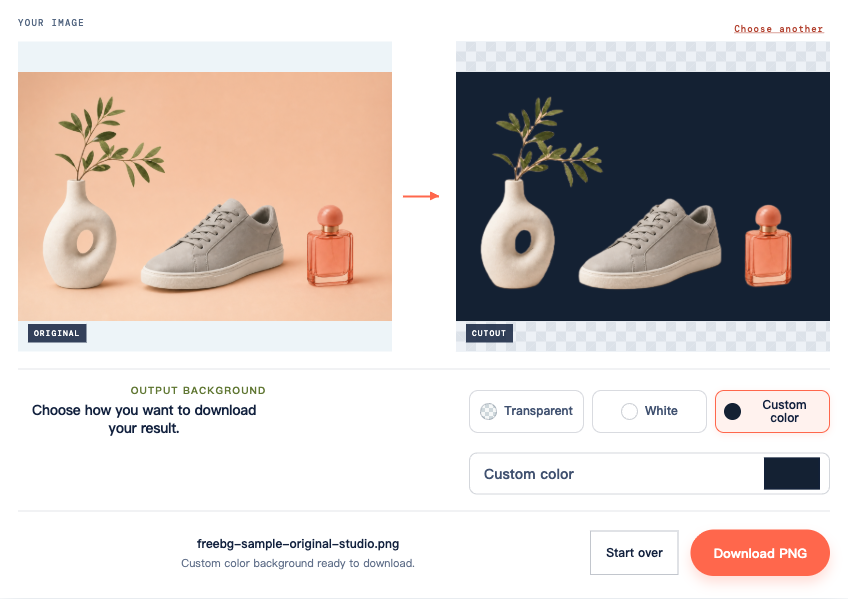
Free BGRemover provides background color choices, but it does not include a brush for restoring missing edges. If an important detail is gone, keep the original and check the troubleshooting section before using the cutout.
4. Switch back to Transparent and download
Under Output background, select Transparent, then click Download transparent PNG.
This matters if you used a solid color to inspect the edge. Leaving White or Custom color selected saves that background into the PNG. The file extension alone does not tell you whether the image is transparent.
Save the downloaded file itself. Taking a screenshot of the preview captures the checkerboard and usually gives you fewer pixels to work with.
5. Confirm the downloaded file is transparent
Place the downloaded PNG in the slide, page, or design where you plan to use it. Change the background color behind the image.
The area outside the subject—and any open holes inside it—should show the new color. If a white rectangle or checkerboard stays attached to the image, those pixels are part of the file. Return to the tool, select Transparent, and download again.
A photo viewer may display genuine transparency as white or black. Test the file on a separate background before concluding that removal failed. The PNG transparency guide covers this distinction in more detail.
Choose the output for where the image will go
Use this table after checking the cutout. Free BGRemover downloads PNG files for all three background options.
| What you need | Select in the tool | Check before using the file |
|---|---|---|
| A subject to place in a slide, website, or design | Transparent | The new layout shows through around the subject |
| A finished white-background image | White | The destination accepts the background, crop, and dimensions |
| A picture on a specific solid color | Custom color | The selected color matches your intended design |
JPG cannot store transparency. Free BGRemover exports PNG, so check that your destination accepts PNG before uploading the finished image. Choosing White changes the background, not the file format.
For a listing or printed design, check pixel dimensions as well as the outline. A file can retain its original dimensions while having a soft cutout edge. Enlarging it does not restore details that were absent from the source.
For a logo or signature on a plain background
Start with a sharp image in which the lettering or ink is clearly different from the background. For a signature on paper, avoid folds, heavy shadows, and glare across the strokes.
After removal, enlarge the preview and check thin strokes, dots, and the holes inside letters such as “O” and “P.” The background should disappear without breaking the lettering. Also check that white details belonging to the logo remain visible.
For instructions specific to these images, see the logo tutorial or signature tutorial.
Troubleshoot the result you see
A white or colored fringe remains
Place the PNG on a dark surface and compare the fringe with the original. It may contain color from the old background or a partially transparent edge that blends poorly with the new one.
Switch between White and Custom color to judge whether the fringe is visible on your intended background. These controls change the background; they do not repair the edge. If the fringe is distracting, try a sharper original or another photo with clearer separation between the subject and background. Re-running the same image with unchanged settings may produce the same fringe.
Part of the subject disappears
Compare that spot with the original. If the detail is present but faint, try a better-lit or sharper photo. Free BGRemover cannot manually restore a missing part of the cutout. If a hand or handle was cropped out of the source, background removal cannot recover it either.
Cropping can reduce distracting objects elsewhere in the frame. It cannot separate an object that physically overlaps and hides the subject. Use another photo if the hidden area is important.
The upload is rejected
Check the actual file format and size. This tool accepts JPG, PNG, and WebP up to 15 MB. An HEIC photo needs conversion; renaming its extension to .jpg does not convert it.
For a large file, export a smaller copy and retain the original. Resize only as much as needed for the tool and your intended use.
Processing fails or seems stuck
Give the first run time to prepare. If the tool reports a failure, check your connection and click Try again.
Repeated failures may come from browser support or device resources. This tool needs WebGPU support; try an updated browser on a compatible device, or try a smaller copy of the image. Older phones may not support this workflow. There is no reliable processing time that applies to every device and file.
The download looks blurry
Check whether you saved the PNG or a screenshot. Compare the original and downloaded image at the same display size.
If the whole subject is already blurry in the original, choose a better source. If only the outline is soft, check it against your intended background at the final display size. Try another original if the edge is too soft for your use; a larger export alone will not fix it.
Before you close the tab
Check the downloaded file in the place where it will actually be used. Look for leftover background, missing details, and unexpected solid fill. Keep both the original and the PNG until you have confirmed the result.
For multiple files, the batch background removal tutorial explains how to process and review a set together.
Questions about downloads and privacy
Where is the image saved on my phone?
Check your browser’s downloads list or the Downloads location in your Files app. A downloaded PNG may not appear automatically in Photos. If your browser opens it in a new view, use its save or share controls to save the file, then verify the saved copy.
Does free removal include the download?
You can process and download a PNG in Free BGRemover without an account, payment step, or watermark. The 15 MB input limit still applies.
Can I upload a client image or personal photo?
Free BGRemover runs background removal in your browser, which downloads the model needed to process the image. Before using a sensitive photo, read the Privacy Policy and check whether your client permits this use of their image.